How to give read-only access to Zapier
Read-only access lets an adviser, bookkeeper, or consultant look at your Zaps and task history without being able to change, pause, or delete anything. It is the safe way to let someone review how your automations are built and what they have been doing, and you can remove the access at any time. Zapier is unusual here: it does not offer a true read-only role for Zaps, so this guide explains the honest options. For most accounts the cleanest path is a short screen-share where you walk the reviewer through your Zaps and Zap history. On a Team or Enterprise plan you can also add the reviewer as a Member and share a folder, and the steps below set out exactly what that does and does not allow.
Watch the walkthrough
Access to grant
Read-only review of your Zap configuration and task history. On personal plans this is done by screen-share. On Team and Enterprise plans there is no Viewer role for Zaps, so member access to a shared Zap or folder is editor-level by design.
Who you're granting access to
- Anyone you need to give view-only access to: a bookkeeper, accountant, consultant, or another adviser who needs to review your automations without changing them.
Before you start
- For a screen-share: a quick video call where you are signed in to Zapier. This works on every plan, including Free and Professional.
- For adding a member (Team or Enterprise plans only): you need to be the account Owner, a Super Admin, or an Admin, plus the email address of the person you are giving access to. Adding a member uses a seat on your plan.
Step by step
- 1
Decide which path fits your plan
Zapier only offers a Viewer (read-only) role for Canvas, Tables, and Agents, not for Zaps. That means there is no way to grant true read-only access to your Zaps. On a Free or Professional plan the practical option is a screen-share (see the fallback below). On a Team or Enterprise plan you can add the reviewer as a Member and share a folder, but that access is editor-level, so only choose it if you are comfortable with that.
- 2
Add a member (Team or Enterprise plans only)
Sign in and go to your account, then open the Members page (Settings, then Members). Click "Add Members" in the upper right. In the Email(s) field, enter the email address of the person you are giving access to. Under Member Role, choose "Member" (not Admin), then send the invitation. The person you invited accepts it using that same email address.
- 3
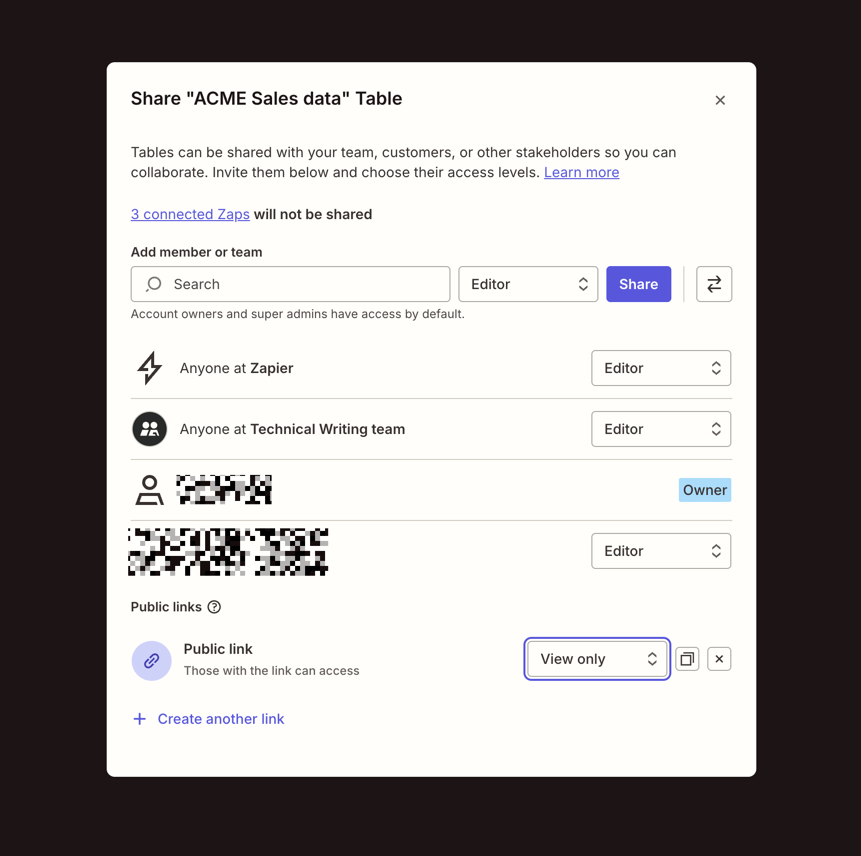
Share only the relevant folder
To limit what is visible, put the Zaps you want reviewed into a single folder first. From the Folders page, click the menu icon next to that folder (or open the folder and click "Share"), then use the "Add member or team" search box to add the reviewer. Zapier adds them as an editor of that folder, which is the only sharing level available for Zaps, so agree in writing that they will not edit or turn anything on or off.
Source: Zapier help centre: Manage assets in your Zapier account - 4
Confirm the access is set up
Once the invitation is accepted, check together what the reviewer can see. For a review they only need to read your Zap setup and the task history (the run logs that show what fired and when). They can view this information, but should not change, pause, or delete any Zap.
Removing access afterwards
- For a screen-share, there is nothing to revoke. No login is ever shared.
- For a member: go to Settings, then Members, find the reviewer, open the menu next to their name and choose to remove them. Their access ends immediately and the seat is freed.
- For a shared folder: open the folder share dialog, select the dropdown next to their name and choose "Remove access".
If that option is not available
The simplest and safest option on any plan is a screen-share. On a short video call you stay signed in to Zapier and walk the reviewer through your Zap list and a few task history runs while they map how everything connects. Nothing is added to your account and no password or login is ever shared.
Frequently Asked Questions
No. Zapier only offers a Viewer (read-only) role for Canvas, Tables, and Agents, not for Zaps. Any member you share Zaps or a Zap folder with gets editor-level access. Because of that, a screen-share is usually the safer way to let someone review your Zaps without granting edit rights.
Yes. On a Team or Enterprise plan, move only the Zaps you want reviewed into one folder and share just that folder, rather than your whole account. The reviewer only needs to read the Zap setup and the task history. On a personal plan, a screen-share lets you control exactly what is shown.
On Team and Enterprise plans, members use seats on your plan, so adding one may affect your billing depending on your seat count. If you would rather avoid that, a screen-share costs nothing and works on every plan.
If you used a screen-share, there is nothing to remove. If you added someone as a member, go to Settings, then Members, find their user and remove them, which frees the seat. For a shared folder, open the share dialog and choose Remove access.
They could, technically, because shared Zap and folder access is editor-level. Zapier has no view-only option for Zaps, so the protection comes from a written agreement that the reviewer will only look and not edit, or from using a screen-share where they never touch your account at all.
Related guides
Steps last checked against Zapier on 2026-06-10.
Based on official Zapier documentation: Zapier: User role permissions in projects and assets, Zapier: Invite and manage users in your Team or Enterprise account, Zapier: Manage assets in your Zapier account (sharing Zaps and folders). Zapier is a trademark of its respective owner; this guide is independent and for instruction only.
Want this handled for you?
Clever Ops connects and automates the systems mid-market businesses already run. Book a free assessment and we will map your stack.